So I hops on the computer, do an exploded diagram of this thing so he knows what he's building and can work out how much poplar for the torsion box frames and how much solid walnut he'll need. Better to have a drawing in front of you, maybe with a detail or two at full scale, than to try winging it on something like this. It's also easier to point at a part on a drawing than to say "The bottom skin of the top torsion box."
Note that the face frame is shown with butt joints, the revised idea was for mitered corners so no end grain would show. Note, in the detail, that the top torsion box and the sides torsion boxes were to be the same thickness. And note that the "inside" skins were going to be 1/2" ply because they weren't going to show much . Those mitered corners and a subsequent design change would come back to bite him in the ass later.
So once the torsion box approach was decided on it was get out the walnut ply and pick where the parts would come from.
Now if you've spent any time shuffling boards, flipping them over, rotating them, etc. - unitl you get the grain to line up the way you want them - imagine doing this with two sheets of 4x8 3/4" ply. It quickly became apparent that he could get the outside skins out of one sheet of ply (remember, this is $174 a sheet), and with the left overs and some careful gluing,, the inside skins of the "legs". But to get the underside skin for the top it would mean cutting up another sheet of $174 ply. A father's love has some limits - and this was one of them. We'd go with 1/2" baltic birch as planned.
Of course, I didn't have a piece of 1/2" baltic birch big enough - big surprise. So, "we" settled for 1/4" cherry which I did have, for the bottom skin of the top torsion box,. THAT decision was going to provide a "challenge" later.
Made up a "cut list" for the solid walnut and poplar torsion box frames and off to the lumber store (not yard). I wasn't thrilled with the price of poplar, but the Peruvian Walnut he picked was almost a deal breaker at over $200 just to hide the edges of the ply and poplar torsion boxes. But I figured it was worth it to do some woodworking with my son. And who knows, he might keep this thing for longer than I'll be around.
If you've got sheet goods to cut up, a sliding table on your table saw sure comes in handy. Some measuring, some ripping, some cross cutting and we were ready to glue up the three torsion boxes that would be most of this coffee table.
Most of my 4x8 assembly bench got used for the glue up - along with bags of lead birdshot to hold things down on other things when clamps couldn't be used.
To give Chas an idea of finish possibilities I did up samples of teak oil, danish oil, walnut oil, two or three walnut stains, and some combinations - on scraps of the walnut ply being used.
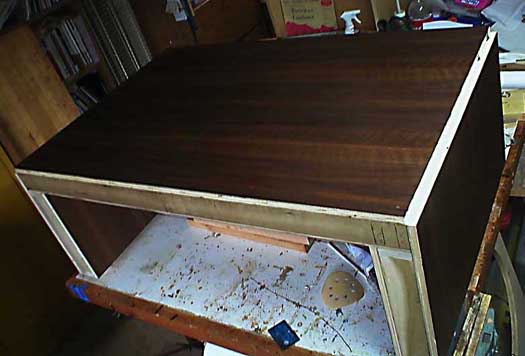
Here are the torsion boxes screwed together - the "inside" skins of the sides are just brad nailed on with the heads extending out for later removal at glue up time.
Disassembled this puppy and Chas took the top over to his stepbrother's (he makes trade show displays) to cut the whole in the top for the "tea candles and rocks" box. He used a template and a half inch spiral router bit to hog out the opening. We later found out that a) his template wasn't square and b) you can route sharp square corners.