Measuring and marking can be a source of problems in furniture making. In this instance two pairs of four drawer openings must be layed out in the front AND the back of the drawer unit. The back needs to be done because these drawers will be accessible from both sides of the bench. That's twety four (3 x 2 x 2 x 2 = 24) opportunities to misread a ruler or tape and/or blow a marking line. But there is an easy way to avoid most of those problems.
Rip some scrap to the thickness of the drawer dividers you're going to use. Cut spacer blocks on a miter saw using a stop block to get three of each of the drawer heights exactlu the same length. Use these blocks to clamp the dividers to the cabinet as shown above.
Then
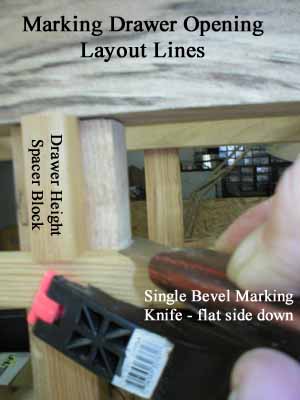
With the flat back of the single bevel marking knife flat on the top of the drawer spacer it's easy to scribe a line on the cabinet part. With a square and the single bevel marking knife you can accurately transfer these scribe lines to the inside faces of the cabinet parts and use them as reference lines for marking out the mortises or dadoes or sliding dovetail joints you're going to do next.
This approach required only three approximate measurements (one for each of three of the drawer opening heights, the fourth opening height is determined by the other three and therefore requires no measuring or marking) to set the stop on the chop or miter saw to each of the three desired lengths. The actual size of each set of spacer blocks doesn't have to be any specific size, just close to the desired drawer height. Being off by 1/32 of an inch or so on any set of three spacers won't matter.
The three parts you've marked on the front of the unit have counterparts on the back of the cabinet with exactly the same length/height because you made them that way. So - the three spacer block sets can be used to mark the parts at the back of the cabinet. Now the layout lines for each of the three marked drawer openings will be nice and consistent and aligned front and back.
Slick huh? The single bevel marking knive comes in real handy. Both a left and a right single bevel marking knife were necessary to do this layout operation. Having a pair seems extravagent at first glance but when you see a real application it's clear you need the pair.
Next step - the internal parts joint layout