With a new batch of kids in the neighborhood there is of course new demand for Magic Wands. Make one a wand and you pretty much commit to making them ALL a wand. And now, having a larger lathe (compared to the little UniMat earlier wands had been turned on), and with a lot more experience with a skew, this batch could be more ornate. Add a handful of Prisma Color felt tipped pens (one end a fine point, the other a bigger chisel point ) I hadn't tried on wood yet - so this batch would have more color.
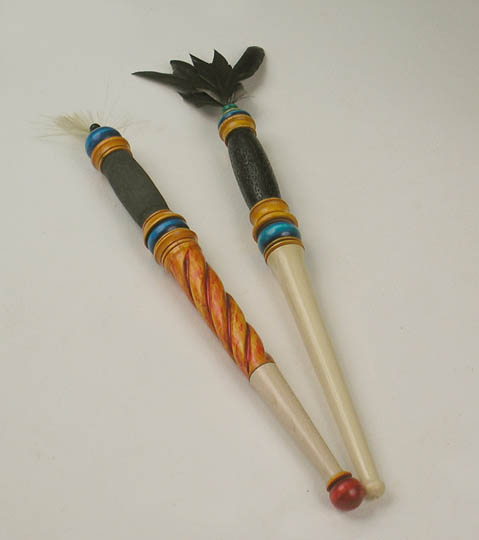
About 13" long, excluding the add enhancements at the top, and a bit over 1" in diameter - in maple - these wands don't look like Harry Potter wands. The one on the right, with the feathers on top( feathers from a feather duster), is Amanda's, age 8. It had a small pearl on the end - but it got knocked off while photographing the wands - and was replaced by a larger tiger eye sphere. (I tried to re-super glue the pearl, but managed to glue the pearl to my finger tip instead) For Jake's wand (age 7) I went with hog hair bristles from a basting brush, with a turned african blackwood peg to hold them in.
I'd wanted to have a go at doing a spiral and Jake's wand presented an opportunity to use a Charlie Neil method I'd seen on YouTube. Thank you Charlie Neal - your practical method for carving spirals works as you demonstrated on your video. Layout a grid in pencil, join diagonals between "boxes" with more pencil lines, saw On The Line then, using a small triangular or round file, widen and deepen the saw cuts and start sanding to round over edges. Really not that hard to do - a bit more difficult to do really well. Took a LOT longer to spray on the 10 coats of gloss lacquer than it did to make the spirals.
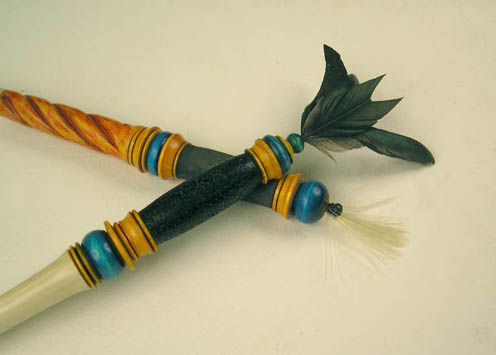
Here's a detail shot of the tops of the two wands. The irridescent greens and blues in the banty feathers are only hinted at in this photo.
Funny how kids become experts on wands and want to show and tell the others about some other turnings I'd shown them earlier. "Show them the one that glows!" - "See, this is a LIdded Box - and watch what the finial, that's the thing on top, does when you tilt the box." - "You've GOT TO show them the bowl that crawls away all by itself!" - "Look, he made this ant - and it's all made out of wood."
And here's the note I found after The Herd Of Kids who came with the new wand owners left. Things like this are priceless - at least to me.
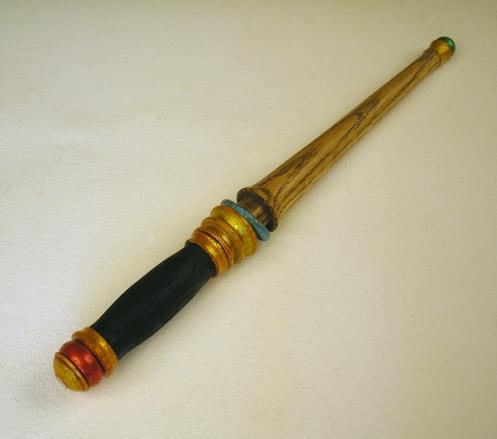
Having done THREE wands in maple, I decided to do the next on in oak, going after a darker, more natural wood looking, look. Had some oak that'd probably work so I went with that. Presented quite a challenge - soft grain soft and hard grain HARD (relative to maple) when it came time to do the captured ring (blue thing below the handle). This turning was trickier than the earlier maple wands - what with the hard/soft and open grain of the oak. You just can't get smooth surfaces in oak unless you use a grain filler, which often masks the dark grain.
Unlike the earlier maple, which is essentially white - and easy to get a smooth surface on - applying the PrismaColors to the wood just wasn't working - the color of the oak muting and darkening the marker colors. I needed some white paint as an undercoat for the markers. Coincidently, I just happened to have some pearlescent white airbrush paint that would do the trick. Still had the open grain surface - but at least I had almost white surfaces to apply the PrismaColor to.
Sometimes you just stumble on to something interesting. With a pearlescent white under them the translucent marker colors created an almost gold leaf/foil affect. Now if you've ever tried leafing anything with coves and beads and sharp edges, you know THAT's not easy to do. And if you airbrush or spray metallic paint instead - you've got all that masking and unmasking and remasking to do. But with the FASKOLOR pearlescent airbrush paint you can brush it on without masking - then apply the marker colors - again without any maksing.
Here's a detail shot of the pearlescent undercoat, translucent marker colors over the undercoat. Oak isn't the best wood to use this method on - but you can get an idea of the results. Will use it on the next MAPLE wand and put up the results here.
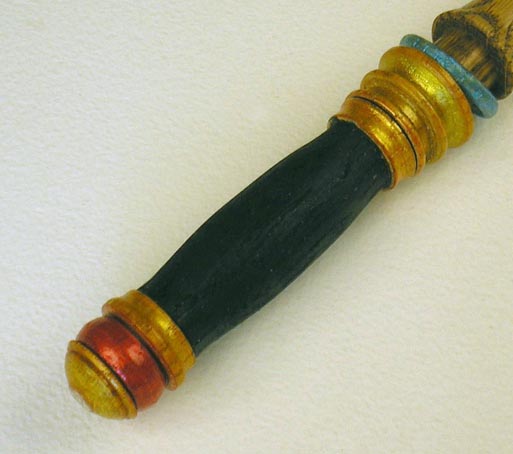
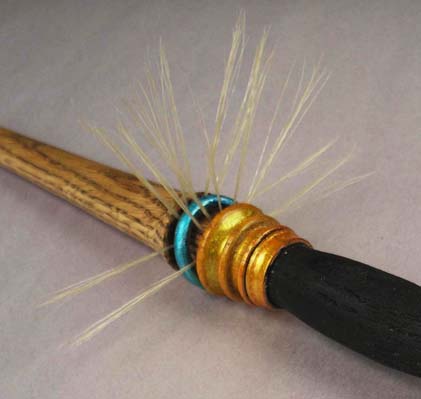
This thing needed some finishing - of the top and bottom. THAT's where things got away from me. I'd used hog hair bristles on Jake's wand and feather duster feathers on the girls' wands - and I still had the pearl I'd glued to my finger earlier - so I decided to put the pearl on the end of this wand - and feathers AND hog hair bristles in the top of this wand. But that big gap around the captured ring . . .
Sixteen little itty bitty holes - with at least SIX bristles per hole - comes to NINETY SIX bristles - individually placed. When each hole wouldn't hold any more bristles the bristles got super glued in their holes - one hole at a time. Great exercise in fine motor skills, a real vision test and a lesson in patience.
And now - two views of the finished Sophie's Magic Wand.
Now I have to figure out how to do a Staff for one of the older kids. Hmmmm - a round wooden closet pole for most of the length - some sort of coves and beads and stuff for the "cap" and something similar for the bottom - maybe a detail somewhere in the middle . . . Hmmmmm.
More to come.