Turning Miniatures
(To skip all this and go directly to the Turning Miniatures Tutorial s- CLICK HERE)
If turning is the Crack Cocaine of woodworking - fast acting and cheap, relativley speaking (assuming you have a lathe, a chuck, some turning tools and some wood) - then turning miniatures is even quicker acting - and more addictive. In an hour, you can turn and finish four or five little bowls out of a cheap dowel, exotic woods pen blanks or some of the scraps you just couldn't part with but didn't know what to do with. You can experiment with profiles, woods, finishes and colors. And it's a great way to turn what may become prototypes for larger pieces later. A profile may look great on paper - but having a miniature in your hand and actually seeing the idea in actual, rather than virtual 3D, may show you something that isn't obvious in 2D.
Turning miniatures is also a very low risk thing - small stuff is less apt to hurt or kill you. A catch when turning a little bowl an inch or less in diameter is definitely not the traumatic experience it might be with larger pieces. (In fact, a 10" diameter blank turning at 1200 rpms has 1,000 times more kinetic energy than a 1" diameter blank turning at the same 1200 rpms. (KE = m X V2). Mistakes and failures aren't a big deal either since the amount of wood involved and the forces involved when turning it are minimal. Blow it and you're just out 10 or 15 minutes of your timem maybe even a half an hour - not 45 minutes to several hours. Turning miniatures is also a great way to develop tool control that will also work for regular sized pieces.
Did I mention that miniatures don't take up much display space? A collection of your turned miniature bowls, and maybe most of the mini hollow forms you've done, can be displayed - in a couple of square feet of shelf space.
Whether you have a BIG LATHE or a small lathe, YOU can turn small - miniatures bowls (as well as plates, even hollow forms and tiny finials).
First I want to give you a feel for what can be turned in miniature. Later I'll provide basic illustrated Step By Step tutorials with accompanying videos on how to turn the basic cuts, then how to turn a miniature plate, bowl, hollow form, finials and hollow forms with finials.
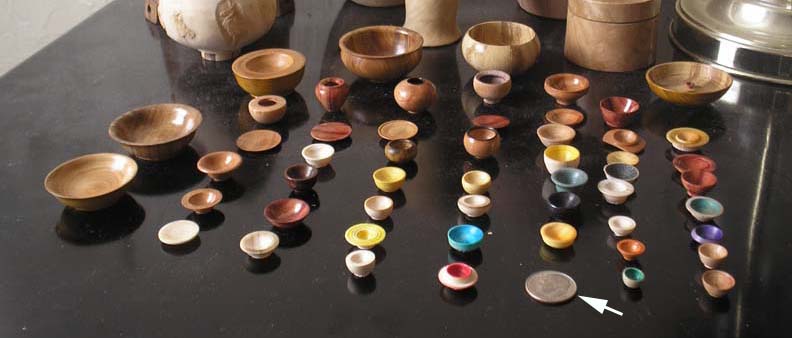
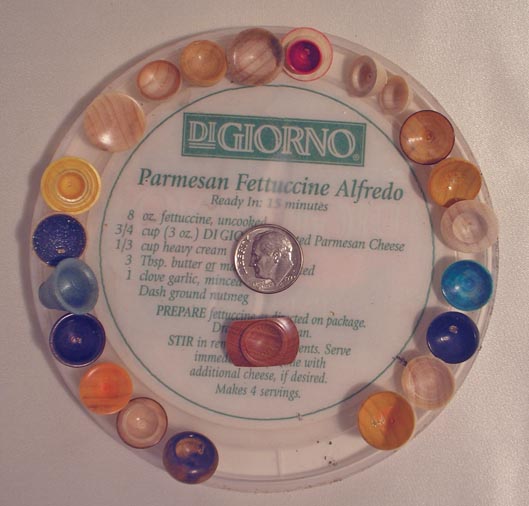
In the time it would take you to turn and finish a regular sized piece you can do four, five or a half dozen miniatures. Here's a low angle shot of about three hours of miniature turning - forty nine miniatures. If you count them, you'll come up with only 48. But if you look carefully in the upper right bowl, that's the 49th - a tiny bowl.
As you can see, you can play with all sorts of profiles. Great for prototyping. (BTW - the coin in this shot is a dime ; )
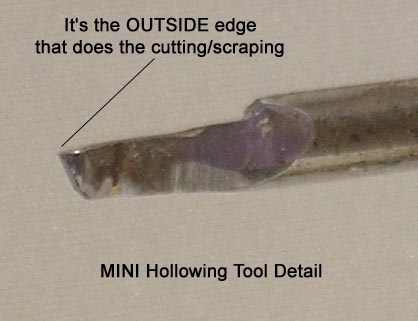
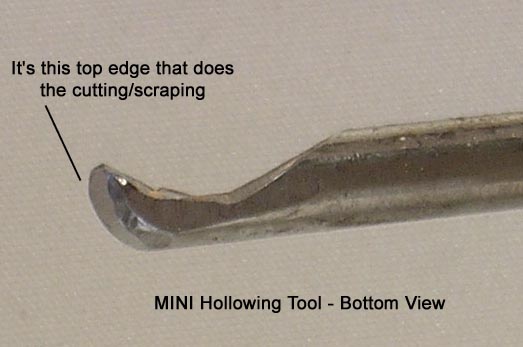
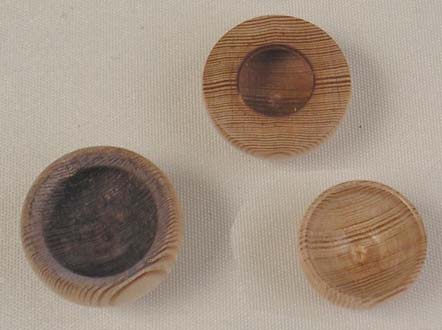
You don't need any special tools to turn small. All of the pieces you've seen so far were turned with four tools. For all but the hollow forms, these are the THREE tools used.
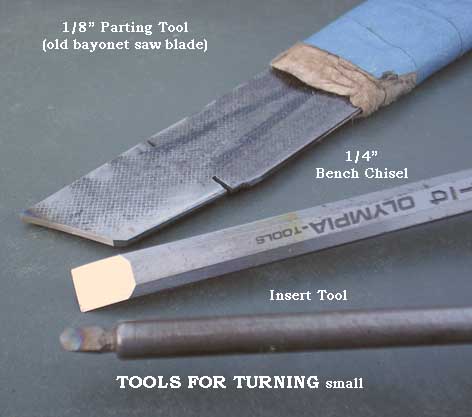
The home made 1/8 parting tool (made from an old "bayonet saw" blade) and the 1/4" bench chisel are used like little bedans - or a single bevel skew. The thin parting tool is used to block out the shape quickly - then the bench chisel is used to do the outside profile The inside profiles were turned with the little insert tool shown, but a small 1/4 fingernail ground spindle gouge used as a bowl gouge works too. I used Abranet and wet/dry sandpaper to smooth the inside profile and for final shaping and smoothing of the outside profile. A paper coffee filter is used to burnish the sanded surfaces and a car wax was used when a shiny finished surface was warranted.
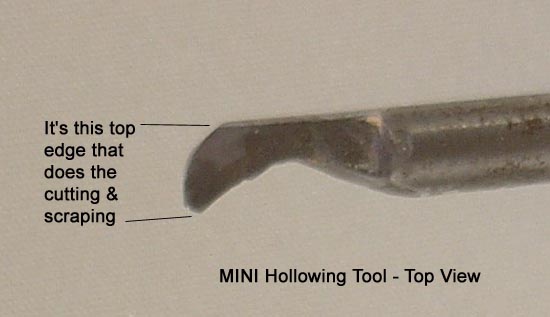
For hollowing (yes, your CAN do miniature hollow forms), I use a home made tool, ground and shaped on my 8" grinder. Not hard to make, though not very pretty to look at. A little allen wrench can easily be made into a miniature hollowing tool.
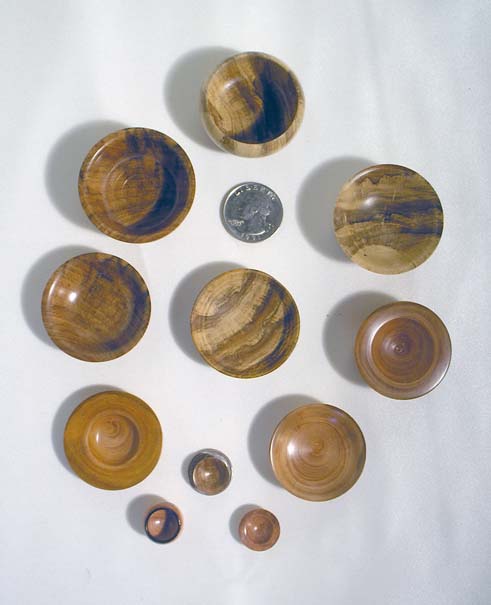
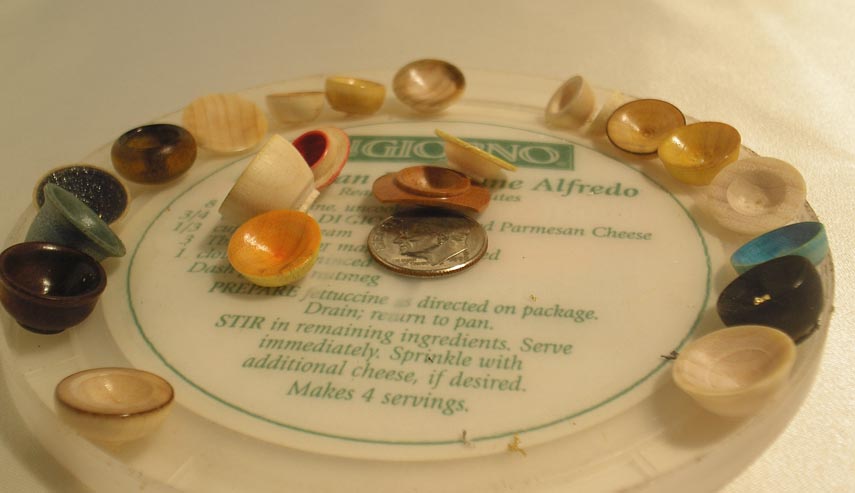
These were the first batch of miniatures I did - out of strawberry quava and plum wood. With the exception of the three pieces at the bottom of this photo, the pieces shown are largish miniatures. The quarter in this photo will give you an idea of the scale of these pieces.
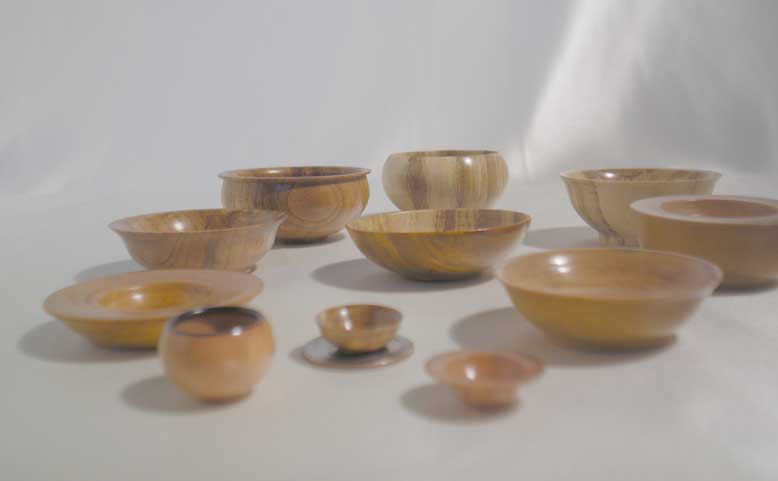
As you can see in the image below, miniatures are a great way to try different profiles and proportions and a quick way to evolve and refine an idea. With an actual piece in hand, regardless of size, it's much easier to do another one, or a variation, at whatever scale you choose, assuming you have enough wood for the piece
(the smallest piece in this photo is sitting on a dime)
If you just want to turn small shapes, a 5/8" or 3/4" poplar dowel is cheap, readily available at BORGS, most hardware stores and lumber yards, and is easy to turn. Because it's a light colored wood, it's also easy to color - with felt tip pens, diluted inks, dyes, paints or even patina solutions. Because poplar dowels are fairly soft wood, turning really thin walls is harder to do than it is when turning harder woods. You CAN turn poplar thin, but it requires a very delicate touch. But since poplar dowels are cheap and you can turn little pieces so quickly, you can get a lot of practice in in very little time. And if you blow it - part off the "learning experience" and try again.
You can also get cherry dowels that are easily turned. Pen blanks in exotic woods are also readily available, An unexpected wood for turning small is - old broomsticks. They often were made of old growth pine - with very tight growth rings. When you sand blast pine, the soft spring wood abbrades away faster than the harder winter wood. The bottom two bowls were "sand blasted" using a small Harbor Freight "air eraser" - a small airbrush looking device - shooting simple and cheap baking soda. Baking soda is a very fine abbrassive so you don't have to worry about the health issues associated with sand blasting or glass bead blasting, BUT wear a dust mask whenever you're "blasting" - even when Soda Blasting.
After you've done a bunch of little bowls, try a small hollow form. You won't be able to do miniature versions of some of Ellsworth's hollow forms because of the minimum sized hole needed to hollow through. But you can still turn nice little hollow forms. The black rim of this example is just scortched wood, done by spinning the piece at 2800 rpms while pressing a paper towel into the hole in the top.
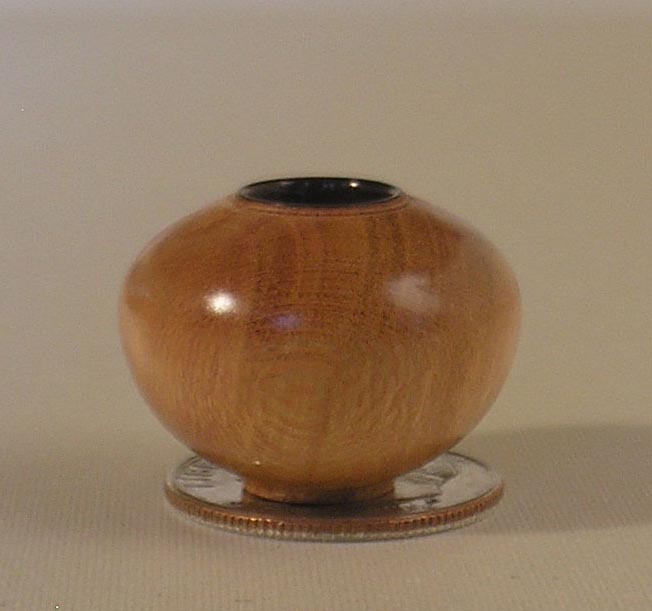
In case you didn't recognize it, that's a dime the piece is sitting on.
How about a little cookie jar?
These are a little trickier. Turn the "jar" first, finish it and part it off. Next, turn a short little tenon on you're remaining blank to fit the opening in the top of your cookie jar. Do the little tenon on the lid FIRST because you're likely to overshoot the fit the first time or two. You want a snug but not Pop Tight fit. You don't want the lid falling off and getting lost. But you don't want to have to really tug and twist to get the lid off either. The lid will be pretty small and delicate and won't handle much abuse.
When you think you've got the lid close to fitting, take its diameter down with 400 grit sandpaper, testing the fit often. If you overshoot and turn the tenon just a little too small, try a coat of thinned shellac. Give it half an hour to dry before testing the fit again. OR - part off the mistake and try again. That's quicker and easier.
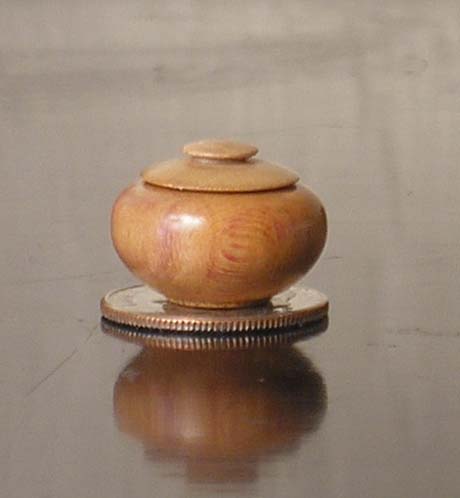
NOTE: THAT'S A DIME THIS LITTLE COOKIE JAR IS SITTING ON

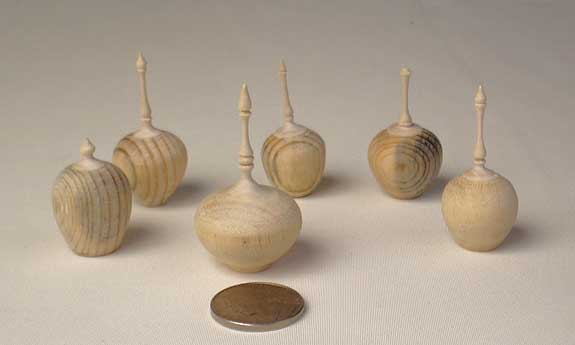
After you've done a simple little lidded vessel, why not turn a small finial for it instead of a simple lid? Here's a little flat topped hollow form, with three different finials/lids - in the order they were done. Notice that the finial started out kind of clunky and got more delicate and better proportioned. A little more difficult to do than the flat topped hollow form they sit on, each only took about 20 minutes to do, mainly because the sanding has to be done as you go and done much more carefully than the hollow form. The profile was gotten close with the bench chisel and a small detail gouge then thinned and refined with 400, 600 and 1500 wet/dry sandpaper, followed by burnishing with a paper coffee filter.
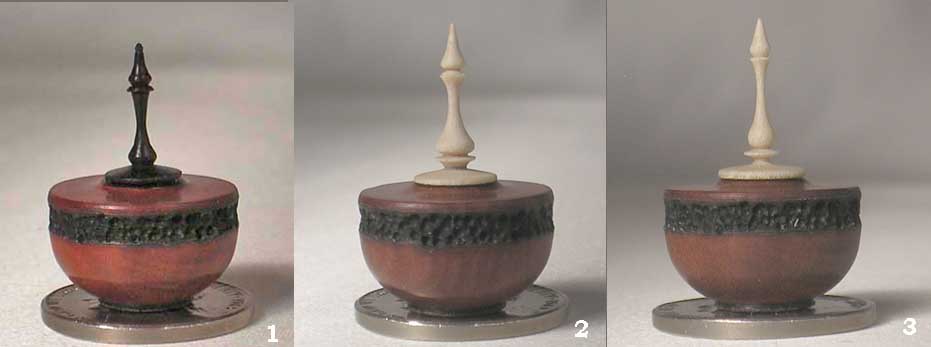
The method for turning the finial - to fit the hollow form - is the same as the one used for the cookie jar lid. Start with the bottom and get the fit to the hollow form's opening first - sand and finish - then work your way up the finial to its tip. Again, you want to work with short areas, sanding and finishing as you go. Things get pretty delicate. Too much pressure and you can snap off everything you've done. A VERY light touch when sanding can mean the difference between a nice result - and a "learning experience" (read "OOPS!") I'll be showing you how I sand delicate things like this in a video we'll get to later.
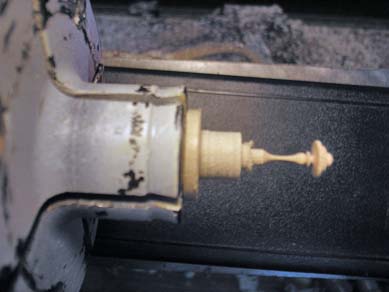
Here's something to be aware off. A finial will appear differently depending on how you're looking at it. ON the lathe it may look fine (1). Upside down it still may look OK (2). But turn it upright, as it will be on the piece, and things that aren't quite right about it will become far more apparent (3).
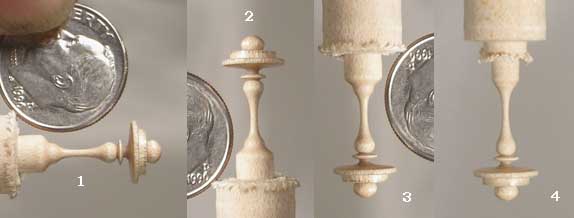
Here's what I saw in (3)
- the diameter of the bottom of the "onion" is too big
- the transtion to the neck of the "onion" isn't smooth and flowing
- the length of the "neck" is too short
- the neck is too fat
I corrected most of those things to get (4). The length of the neck is still a bit short, but I can always turn another more refined version. (and I have - see below)
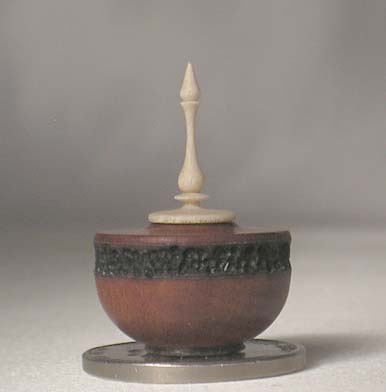
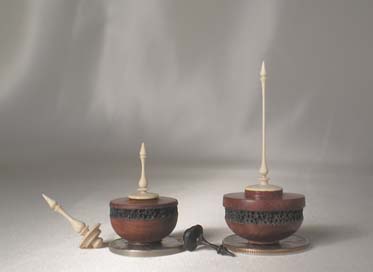
Here's the best finial - so far - on its flat top hollow form. Yes, that's a nickel the piece is sitting on.
LONGER NECK!?] How much longer and how much thinner can poplar be turned?
At least this long and this thin. Have a feeling I could go taller and maybe thinner but going Goya-esque only works up to a point beyond which the result is just showing off - and not very aesthetic.
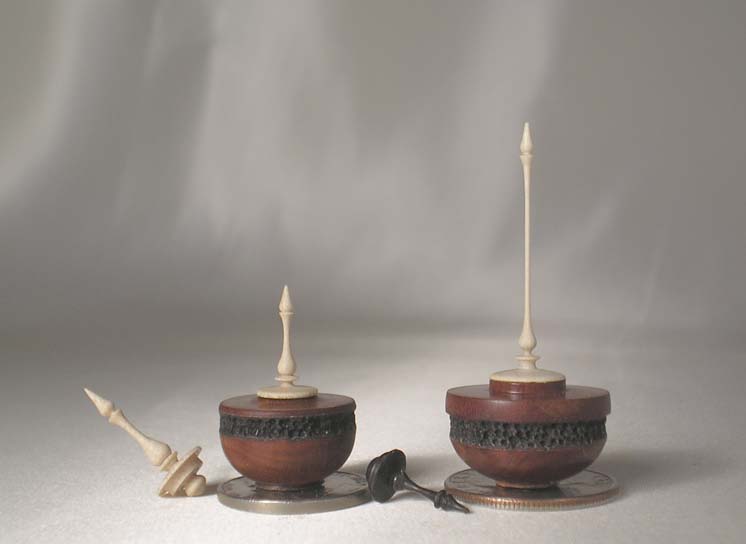
The finial on the right looks pretty thin. At its ACUTAL size, it's even thinner.
see
This Flat Top HF with Finial thing is a bit addictive.
Here's LargeMediumSmall (still have to do the pyro work on Large)

We started this Turning Miniatures Journey with the basic spindle cuts - lines, grooves,V cuts, coves, Ogees, and rounding cuts. Then we used them to turn
- a plate
- a bowl
- a hollow form
and
- a hollow form with finial
Now, let's put all the pieces together and add a pedestal|
to do
THIS
shown about actual size.
For the How To for turning your version of this T-Ball, CLICK HERE.
So far we've been dealing with individual pieces or individual components of multiple part pieces. Each is turned independently. But if you want to integrate a finial with a hollow form and have them flow together rather than look like two piecesone STUCK ON the other, you have to "blend" the top of the hollow form and the bottom of the finial together.
For much more about how to turn a "blended finial", CLICK HERE.
Why not head out to the lathe - and turn your own version of any of the miniatures you've seen here?
Still not sure?
CLICK HERE for the Step By Step illustrations and links to the videos for each one.
NOW do you want to turn some miniatures? Try it, you'll like it! Be aware, turning miniatures is addictive. You've been warned ; )