One Method of Turning A Lidded Box
If you're anything like me, when you got your first lathe you probably did a lot of "between centers" / "spindle" turning, in part because you didn't have a chuck - yet - and because you wanted to start with smaller pieces which could be made from some of all those pieces of scrap you'd saved from previous woodworking projects (OK, so I'm the only one who saves every little piece of really nice wood). You tried all of yor gouges and scrapers and learned to turn grooves, coves and beads, tapers, mushrooms and a lot of combinations of those basic cuts. Every knob and drawer pull in your house has either been replaced with a nice turned one, or you've made enough to do it - someday. You probably also turned some weed pots - basically short fat spindles - with a hole in the top for a dried flower or some "weeds" Since most lathes come with a face plate, you may or may not have turned a plate or two, or perhaps some shallow bowls, maybe a cup or two and even a relatively tall vase. You've got the basic skills of turning, as well as the tools.
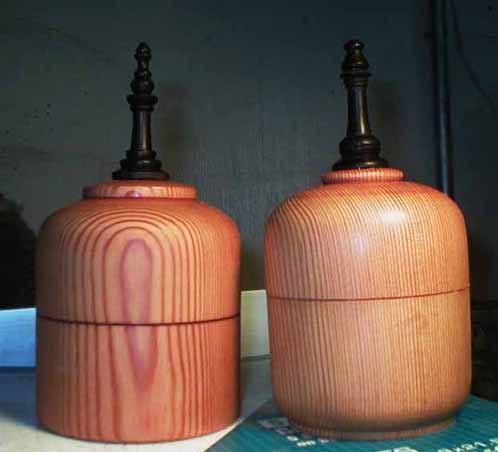
Somewhere along the line you see a demonstration, or watch a video, or read an article on turning "lidded boxes" something like the two examples below - with or without finials.
You can turn spindles from here to Tuesday, probably have the tools to do one, and you've probably turned some hollow vessels so you've played in end grain. But doing a turned lidded box? There's that fitting the lid part that seems too tricky - and then there's all that chucking, rechucking, reverse chucking and jam chucking. Remove something too soon and you're SOL and have to start all over again. "It's just too complicated for me! But someday . . ."
Well my friend - TODAY'S THE DAY! What follows is a step by step procedure - with lots of hopefully clear illustrations - of how to go from a 10 or 12" 4x4 roughed to round to TWO, count 'em TWO! lidded boxes, including adding the finial of your choice. Each "page" of the instructions is a GIF image file you can download, print at your leisure, take out to the shop and do what's on each page. When you get to the end of page 6 you should have your first turned "lidded box". If the lid doesn't fit just right or the shape could use some changes or the walls are too thick - MAKE ANOTHER ONE!
Page 1 - An overview and some critical dimensions to be aware of and remember
Page 2 - Between Centers - where to cut tenons and "lips"
Page 3 - Chucking the Bottom, drilling a starter hole and hollowing out with a skew
Page 7 - Two more examples to get your creative juices flowing and some links to other instructions
A Double Lidded Box (HUH?) ---->
Now I have a request. When you take these notes/instructions out to the shop and try them out - PLEASE add notes to yourself about things that aren't clear or additional illustration ideas which would be helpful. It'll make your set more meaningful and helpful to you next time. And I'd appreciate it if you e-mail me your suggestions for changes/modifications/additions. The goal is to get others to try - AND SUCCEED at making their first turned lidded box.
Thanks
Charlie Belden
aka charlie b
charlieb@accesscom.com